Time to add some whoa
So we got the differential installed to make it go, now we need to get some brakes installed to make it woah.
We have already cleaned up the backing plates and got them painted, and the rest of the axle was done in Part 1 and Part 2 of our GM 12 bolt rebuild. So now we install the backing plates on the axle. We used new hardware for this, as the old original bolts were too far gone to reuse. So with 4 – 3/8″ bolts, nuts, and lock washers on each end of the axle we bolt on the backing plates for the brakes.

All those parts
With the backing plates installed we can proceed with installing the new brake hardware. First we reinstall the anchor pin. After the anchor pin is tightened back into place we install the new wheel cylinders. We will be using the original bolts for mounting the wheel cylinders to the backing plates for the time being. None of the parts kits we got had new bolts for the wheel cylinders, and as of yet I have not purchased new ones. These bolts are not in the greatest condition, and should be replaced, but they will suffice for now. Next it is time to try and install all of the springs, tensioners, tighteners and adjusters, that make up the drum brake system. Sometimes when the stars align, this can be quite easy. Most of the time it will require a liberal application of colorful language, to get all this to work.
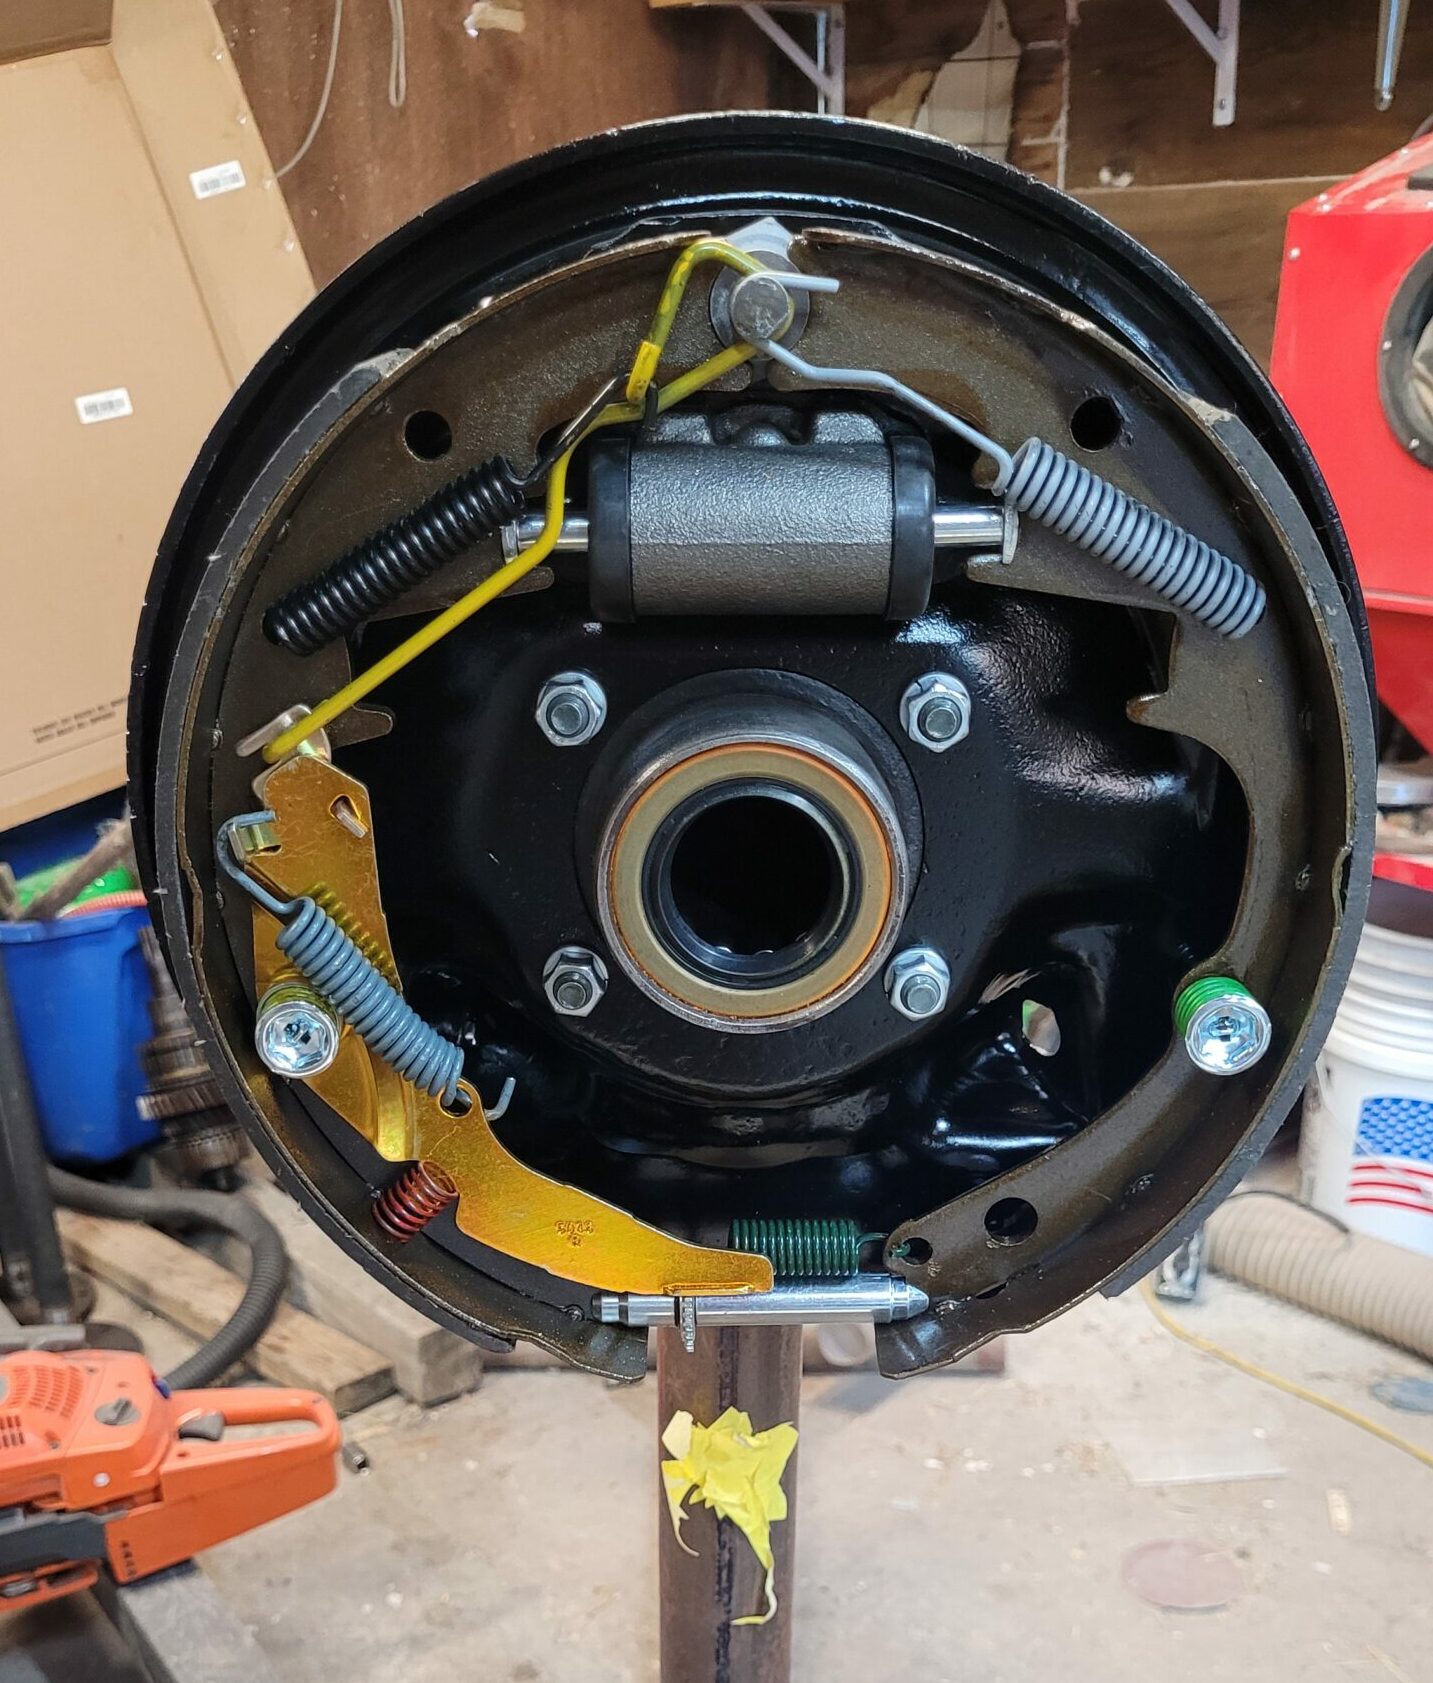
Here is a layout of approximate locations for all the parts.

A picture is worth a thousand words
We got this image from a website with a short pictorial on how to get all the pieces together. One thing to note, the parts kits we got, Raybestos H2509 (Right rear drum brake self adjuster repair kit), Raybestos H2508 (Left rear drum brake self adjuster repair kit), and ACDelco 18K1597 (Drum brake hardware kit) do not include the strut spring. We had to get them separately. You will also want to save and reuse the Stud bolt (not pictured), guide plate, strut, and the emergency brake actuator arm (not pictured), if possible. These parts seemed to be a bit harder to find, if they need to be replaced. Once assembled it should look something like the following. Note: We had to take some of this apart because we forgot to put the guide plate on the stud bolt before hooking up the springs to the stud bolt.

Houston we have a problem
When we got to this point there was a short pause while we waited for our new brake drums to show up. When the new drums arrived I picked up one of the boxes and knew right away there was something wrong. The box was a lot heavier than the old drums that had come off this axle. So we hauled one out to the shop and opened it up. This thing was massive compared to the old drums. So we immediately logged into Rock Auto where we had purchased the drums and checked to make sure we had received the correct parts and that these parts were actually intended for a GM 12 bolt truck rear axle. Everything checked out, and then we noticed there were drums for 2″ brakes and the drums we had ordered were for 2-3/4″ brakes. This quickly became a “well shit” moment.
We will continue this in the next post where we will go into greater detail about what we found and how we chose to deal with the situation.